First of all: I get a bit embarrassed when I reply to anonymous comments - I have this idea that people are going to think that I wrote the comment myself. You know, just to have a reason to answer that particular question, or, in this case, make a tutorial. So just to be clear, I
swear I didn't write this! :) Actually, I don't think it's going to be much of a tutorial - I'm far from a Photoshop wiz. But I'll give it a try!
I take all of my photos myself (unless stated otherwise, but so far I took all the photos on the blog myself), with a
tripod and remote control. My camera is a
Canon Rebel T2i and I always use a
50mm 1:1.8 lense.
Since I don't know a lot about Photoshop editing, I make sure that the original photo is as good as it can possibly be. I'm a self taught photographer and I don't know much about the technical side of photography, but I would dare to say that after six years of constant trial-and-error practice I'm starting to get the hang of it!
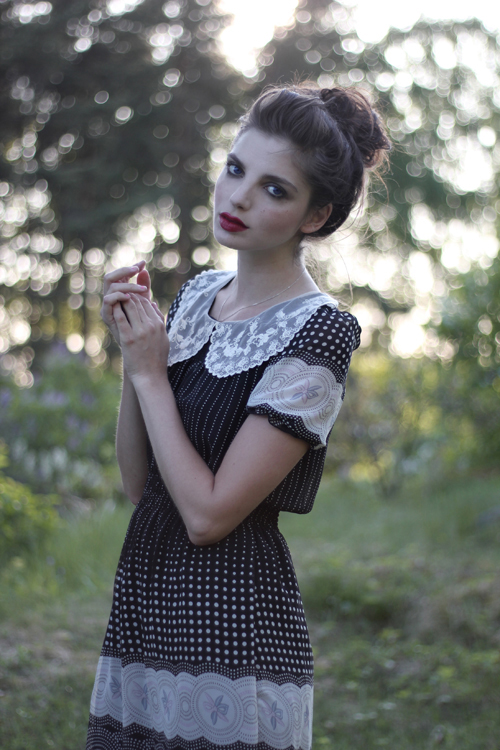
Taking an outfit photo that I'm satisfied with requires a combination of two things. Or, actually four things, but let's say it's two different categories.
1) The composition, pose and expression.
If I don't get these things right in the camera, there's obviously no way I can fix it by editing the photo afterwards. So it all needs to come together nicely. I try to make sure my clothes and hair look as they should, that the framing is how I want it, and that the poses and facial expressions go well with the outfit and the surroudings.
As long as these three requirements are filled, the outfit photo will be... allright. But there's no way it will be great if the second part doesn't work. And the second part is obviously -
2. The lighting.
When it comes to photography, lighting is
everything. If the light isn't right, I don't have a good photo, period. I'm sure a photographer who knows what she's doing can make almost any weather work for outdoor photos, well, I sure can't! I need
sunlight, more than that: I need that magical, low,
just-before-sunset-sunlight. This means I take my photos mostly in the evenings, about an hour before it gets dark. I sometimes have to move the camera (and myself) around for a while, until I find the perfect position for the light.
So, if the composition is good, as well as the pose, the expression and the lighting - then I can start editing. I almost always edit my photos before uploading them, the originals are usually way too plain and grey for my taste! I love the more dramatic look, with a
lot of contrast.
OK, now I'm going to try this whole tutorial-thing. Since I improvise when I edit the result won't look exactly like the ones I already edited, but I'll try to make it similar.
Let's start with this photo:
This is what the boring original looks like:
I told you! Plain! Grey!
I start by making it lighter in Curves.
Then I use Curves again, for the right amount of contrast.
The photo to the left is the tutorial one, the photo to the right is the one I edited yesterday. Because the hard contrast can make unflattering shadows that were almost invisible in the original suddenly show up, I sometimes use the clone stamp tool to get rid of the ones I don't want.
Umm, that was it!
One more photo:
The face might not be great in this one, but I love the colors! Originally the image looked like this:
OK, we need a looooot of contrast here. I know this original looks really bad, but as soon as I saw it on the camera monitor I knew that so many lovely colors would come out when I started editing.
New layer: Brightness/Contrast: 100%!
New layer: More more more! 100%!
New layer: Even mooooore contrast! Wait, stop, that's a little bit too much orange for me.
Didn't know how to capture this, but I used the eraser tool to take away some of the orange, using layers - by setting the eraser tool opacity to 42% I made the lower part of the photo a little less colorful.
Now let's compare my tutorial photo (right) with the photo I edited yesterday (left) - it's pretty much the same, right?
Well, I warned you, that was it! I mostly use either Brightness/Contrast och Curves, and if I have a "secret", it's that I only edit photos I like from the beginning. The composition, pose, expression and lighting all have to come together to create a photo that editing can make look fabulous!
Hopefully I'll be able to make better tutorials in the future, please be patient. :)
If you have more questions about my photography or editing, just ask in the comments and I'll try to answer as soon as I can!


