Showing posts with label tutorial. Show all posts

Saturday, September 17, 2011

Tutorial: How I Edit My Photos, 2.

One of the questions I was asked in our little Q&A session was how I edit my photos.

I actually made a very simple photo editing tutorial back in May - gosh, only six days after I started the blog! I really went all in straight away, it seems.

Anyway, since I rarely get that beautiful backlight anymore (one of the few things I don't like about this season), the editing of my photos is - if possible - even simpler now. OK, it might be exactly the same, come to think of it. Nevermind, I'll make a new one anyway, just to show you how easy it is!

I use Photoshop for all of my editing, but these things can be done in most editing programs. The only free software I've tried is Gimp, and I found it worked just fine, as long as you don't attempt to do anything too advanced.

Now, let's edit a photo in two quick steps!


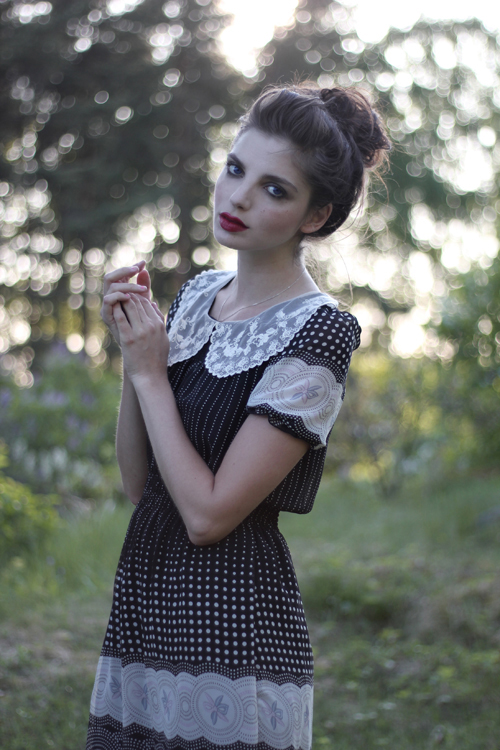
So, we have our original. It doesn't look too bad, but when we have all these beautiful colors - the red of the sweater and lips, the navy blue blazer and the green surroundings - why not make them pop?


Step 1 - I'm using Curves to make the photo a bit lighter. Not because it's too dark, but because it will keep those barely noticeable lines and shadows in the face from suddenly becoming much more visible once we get to step 2. It also helps bring out the colors, as well as make sure we don't lose all the texture of the clothes and hair.


Step 2 - I choose "Brightness/Contrast" and just crank the contrast up to a 100%. Because we started by brightening the image, we can use this much contrast without making the photo appear too dark.


...and we're done!

If I was to spend more than two minutes on the editing of this photo, I would probably make my neck a little less dark, and bring out the texture of the pants, since they are now nothing but a black mass. I could also use "Hue/Saturation" to make the colors even more vibrant. Should we try it? Well, why not.


First, we need to make sure we have the layer with the brighter version of the original underneath the new layer with all the contrast on. Then let's choose the eraser tool, set the opacity to around 20%, and start working on the pants! We want to bring out the feel of the fabric, without making them look grey.


There we go!


Okay. Now we're going to make a copy of the background layer and then merge down the top (contrasted) layer. We then use the eraser tool again, this time on the neck. Then we make the brighter, bottom layer a little bit more bright, using Curves.


And then a ton of contrast to even everything out.


And why not add a bit more saturation, while we're at it?

I made a new layer first, then erased the lower part of the face from the saturated layer, because the lipstick popped a bit too much. Then I used the clone stamp tool to even out the neck, since it looked a bit spotty.


So, now we have the old finished version to the left, and our more advanced result on the right. Not that much of a difference - which is why I very rarely take the time to make those extra touches (unless I'm working on paid assignments where the photos are going to be printed, obviously) - but they do claim God is in the details...

Last but not least, I decided to use the clone stamp tool to make myself superdupermegaextra pretty, like a supermodel! Like a SUPERDUPERMODEL! (Those are even more beautiful than supermodels, unless you didn't get that.)


Enough with the fun and games - I have to leave for Stockholm in, well, I should have left ten minutes ago. My sister Amanda and I are going to the Blog Awards gala and we're meeting in an hour to get all dolled up and ready to mingle! I have made peace with the fact that I haven't got even the slightest chance of winning - no hard feelings, this blog is still a baby and I haven't got very many Swedish readers - but that sure won't stop me from looking like a winner... Tomorrow it will be up to you to decide if I succeeded!


PS. I'm hoping that the wonderful photographer Elin "Nevnarien" Kero wins the award in my category. She seems like the sweetest girl and her photos are truly magnificent. Check out her blog - sure, it's in Swedish, but a picture says more than a thousand words and so on! DS.

Thursday, June 30, 2011

Everything you need to take your own outfit photos (and making them look pretty great).

Izzy commented on my last post:

"Yea, my boyfriend when he takes my photos here at the lake snaps about four or five times and thinks he's done me a great favor haha. It's funny how when it's just the right pose and expression, no photoshop is required but otherwise...YIKES. At home I'll take about twenty or thirty shots. I'm thinking of investing in a slightly better camera since I'm loving this blogging experience. Which would you recommend for a style wannabe but non-professional broke girl?"

First I must say, yes, exactly! When a photo is good - lighting, pose and expression - there's really nothing to do in editing. But when the lighting is so-so or even bad, and you have to start making parts of the photo lighter or darker, suddenly you notice all these weird shadows in your face and go "is this what I look like?!". I choose to see it as no, that's not what I look like, it's just a low quality photo. That tiny little detail that only one photo out of twenty succeeds in capturing what I "really" look like... I simply ignore that. ;)
 The camera I use - the Canon Rebel T2i.

Oh, and now onto your question! (I decided to reply in a post since I've been asked this quite a few times already.)

I use a Canon Rebel T2i (Canon EOS 550 D in Europe), and I'm so happy with it. I got it last summer and even though it's far from the fanciest camera, I've never felt like it's not good enough for me - and I've shot plenty of magazine features, book covers and press photos with them. (OK, maybe not plenty of book covers, but a few.) Noone has ever complained about the resolution or the technical quality.
The Canon Digital Rebel XTi - an affordable (when bought used) option and a great start-out DSLR camera.

My camera also records decent HD video and it costs about 750 USD new or 600 USD used at Amazon.com (here). But - if you're not that interested in video recording and just want a good digital SLR camera to start out and practice with, one of the first I bought was the Canon Digital Rebel XTi that came out in 2006. That camera you can buy used from 375 USD here and it truly is a great choice! 

But of course, in the end it comes down to what you want to get out of your camera and how high you need the quality to be. There are so many options out there, in every price-range, and I can only tell you about the ones I've used. I've been loyal to the Canon Rebel-series since 2005 - I've never found a reason to switch to another brand, just updated to the latest model every couple of years - so I know nothing about any other type of DSLR camera. Spend a lot of time researching on google, there's a perfect fit for everyone out there!
 The 50mm lens - the best way to get a vivid and dynamic portrait photo.

I would absolutely recommend to everyone who's getting into photography to rather buy an older DSLR camera and instead invest an extra 100 USD to get the 50mm lens. According to me, the lens is what makes all the difference when getting a really good photo. The 50mm can be hard to get used to - you can't zoom in or out, and since it's a portrait lens it's definitely not for photographing landscape or to bring when you go sightseeing and want to capture... the Empire State Building or something. But if you, like me, prefer to take photos of people or close-ups of beautiful things - I'd say it's the best one you can buy. It lets in so much light, the short depth of field makes the photos very dynamic and I think the result is so much more vivid and alive than with other lenses.


 The 50mm lens' shallow depth of field prevents your photos from ever looking flat!


When I take photos inside my house, I use my 18-55mm lens to capture the wider spaces of the rooms...


...and the 50mm lens for the details!

The only time I use my standard 18-55mm lens is when I photograph the rooms of my house, and I sometimes use my giant zoom lens for shooting at concerts, fashion shows or for nature close up photography (birds in trees etc).

Without a tripod and a remote control, there would be no outfit photos in this blog. Come to think of it - there wouldn't be a blog, at all. I get way too awkward posing for other people - plus, they'd never have the patience to get everything exactly like I want it... Control freak, who? Where? What?


And for those of you who are looking to take your own outfit photos: what you need is a good tripod (like this one) and a remote control that is compatible with whatever camera you choose to buy. A lot of people have asked me about why my remote doesn't show in the photos - the one I use is the kind that gives you a couple of seconds before the actual photo is taken, so I have plenty of time to put the remote in my pocket, hide it in my palm (or just put the hand holding it behind my back). 

I've never used the self timer and if you're using the 50mm lens, it's impossible - you have to set the focus by pressing the remote and then stay exactly where you are the seconds before the camera takes the actual photo, otherwise all you'll get is blur. So you can't set the timer and then get in the picture, the focus has to be set on you, by you (or rather, by your remote). I've tried tons of different remote controls - they tend to stop working after a while - and I just buy whichever one is in stock at the moment. Right now I'm using this one and I think it's flawless. A tiny switch gives you the option to either let the camera go off at the same moment that you press the button, or give you the extra time to hide the remote. I use the instant setting when I take photos of my face or shoes (since the remote isn't in the photo anyway and I'm not patient enough to stand still when it isn't necessary).


Wow, this sure became a long post. I hope it can offer some assistance to someone!

(You can find my very simple photo editing tutorial here.)


Saturday, May 21, 2011

Photo editing tutorial - my first try!


First of all: I get a bit embarrassed when I reply to anonymous comments - I have this idea that people are going to think that I wrote the comment myself. You know, just to have a reason to answer that particular question, or, in this case, make a tutorial. So just to be clear, I swear I didn't write this! :) Actually, I don't think it's going to be much of a tutorial - I'm far from a Photoshop wiz. But I'll give it a try!

I take all of my photos myself (unless stated otherwise, but so far I took all the photos on the blog myself), with a tripod and remote control. My camera is a Canon Rebel T2i and I always use a 50mm 1:1.8 lense.

Since I don't know a lot about Photoshop editing, I make sure that the original photo is as good as it can possibly be. I'm a self taught photographer and I don't know much about the technical side of photography, but I would dare to say that after six years of constant trial-and-error practice I'm starting to get the hang of it!

Taking an outfit photo that I'm satisfied with requires a combination of two things. Or, actually four things, but let's say it's two different categories.

1) The composition, pose and expression.
If I don't get these things right in the camera, there's obviously no way I can fix it by editing the photo afterwards. So it all needs to come together nicely. I try to make sure my clothes and hair look as they should, that the framing is how I want it, and that the poses and facial expressions go well with the outfit and the surroudings.

As long as these three requirements are filled, the outfit photo will be... allright. But there's no way it will be great if the second part doesn't work. And the second part is obviously -


2. The lighting.
When it comes to photography, lighting is everything. If the light isn't right, I don't have a good photo, period. I'm sure a photographer who knows what she's doing can make almost any weather work for outdoor photos, well, I sure can't! I need sunlight, more than that: I need that magical, low, just-before-sunset-sunlight. This means I take my photos mostly in the evenings, about an hour before it gets dark. I sometimes have to move the camera (and myself) around for a while, until I find the perfect position for the light.

So, if the composition is good, as well as the pose, the expression and the lighting - then I can start editing. I almost always edit my photos before uploading them, the originals are usually way too plain and grey for my taste! I love the more dramatic look, with a lot of contrast.

OK, now I'm going to try this whole tutorial-thing. Since I improvise when I edit the result won't look exactly like the ones I already edited, but I'll try to make it similar.

Let's start with this photo:


This is what the boring original looks like: 


I told you! Plain! Grey!


I start by making it lighter in Curves.


Then I use Curves again, for the right amount of contrast.


The photo to the left is the tutorial one, the photo to the right is the one I edited yesterday. Because the hard contrast can make unflattering shadows that were almost invisible in the original suddenly show up, I sometimes use the clone stamp tool to get rid of the ones I don't want.

Umm, that was it!

One more photo:


The face might not be great in this one, but I love the colors! Originally the image looked like this:


OK, we need a looooot of contrast here. I know this original looks really bad, but as soon as I saw it on the camera monitor I knew that so many lovely colors would come out when I started editing.


New layer: Brightness/Contrast: 100%!


New layer: More more more! 100%!


New layer: Even mooooore contrast! Wait, stop, that's a little bit too much orange for me.


Didn't know how to capture this, but I used the eraser tool to take away some of the orange, using layers - by setting the eraser tool opacity to 42% I made the lower part of the photo a little less colorful.


Now let's compare my tutorial photo (right) with the photo I edited yesterday (left) - it's pretty much the same, right?

Well, I warned you, that was it! I mostly use either Brightness/Contrast och Curves, and if I have a "secret", it's that I only edit photos I like from the beginning. The composition, pose, expression and lighting all have to come together to create a photo that editing can make look fabulous!

Hopefully I'll be able to make better tutorials in the future, please be patient. :)

If you have more questions about my photography or editing, just ask in the comments and I'll try to answer as soon as I can!